
Get set up and routing
Apply in five minutes, then work the launch checklist until jobs route to you. Most shops finish the same day.
- 01
Apply once, briefly
The application is five minutes: your business, your services, your coverage area, and the provider standards acknowledgment. Nothing blocks your signup. You land in your dashboard immediately.
- 02
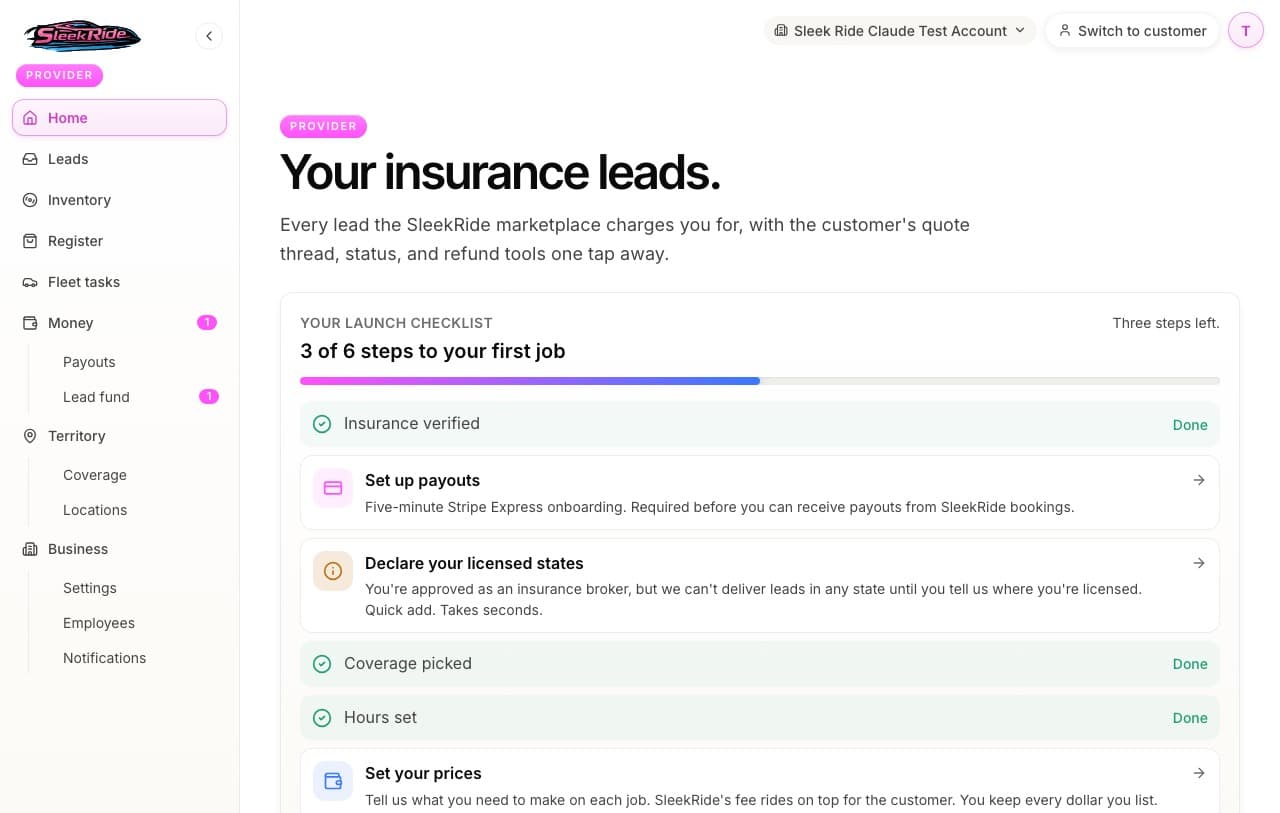
Work the launch checklist
Your dashboard opens with a checklist that tracks exactly what stands between you and your first job: payouts connected, insurance on file, coverage picked, hours set, prices entered. Each step deep-links to the right page and checks itself off.
- 03
Upload your insurance certificate
Insurance is the one hard gate. General liability plus garage keepers for shop work, E&O for insurance brokers, and rentals need no certificate at all. A human verifies your upload, usually the same day, and your routing switches on the moment it clears.
- 04
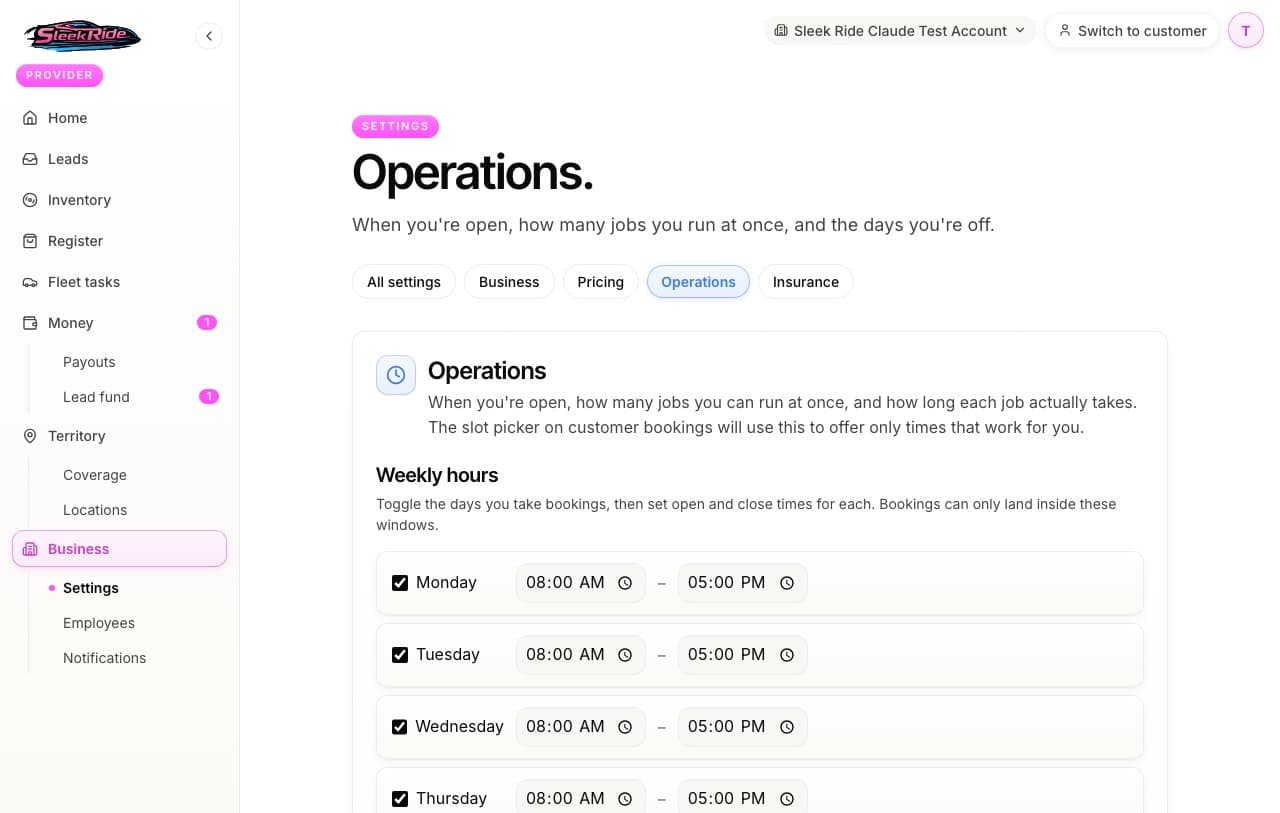
Set your hours, capacity, and durations
The slot picker only offers customers times inside your windows, at your real concurrency, for your real job durations. Honest numbers here mean a calendar you can actually keep.
- 05
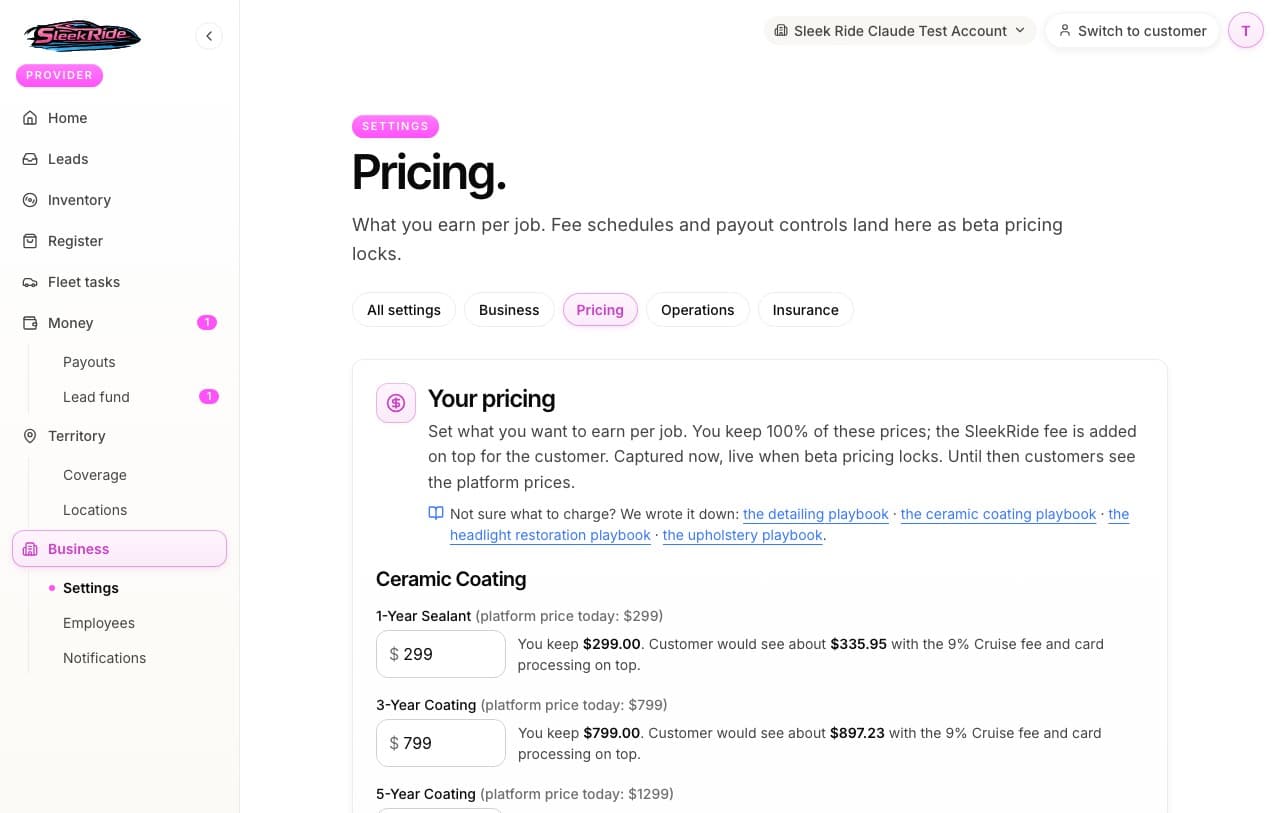
Enter your prices
Tell us what you need to make on each package. The moment you hit save, that price is live. Customers pay your price plus the service fee and applicable sales tax, and every dollar of your price lands in your pocket. The page shows you exactly what the customer sees.
The rules, plainly.
- Signup never blocks, routing gates
- You can explore the whole dashboard from minute one. Jobs route only after your insurance certificate is verified, and a lapsed certificate pauses new jobs until it's current again.
Updated 2026-07-14. Something here doesn't match what you see? Tell us and we'll fix the guide.